
Hey everyone!
Sorry for the delay, but here’s this week’s What’s the deal!
I have to admit that I forgot to post on Thursday (though, I suppose that much is obvious), but I don’t have an excuse for yesterday because I just got lazy. Because of that, I’ll be posting this today and the pattern tomorrow. I apologize for my laziness, but I hope that this tutorial will make up for it!
Today we’re going to be looking into provisional cast-ons. I only learned how to do this recently (mostly because I thought that it would be much harder than this), and it’s really not that difficult! The only additional item you need is a piece of scrap yarn long enough to hold your casted-on stitches! Aside from that, you’ll need all the regular tools: knitting needles, yarn, and your wits!
I used this cast on for a lace glove pattern that calls for knitting the palm and fingers separately from the wrist portion, though I’m sure there are many uses for the provisional cast-on that I haven’t gotten to explore yet! I can only imagine that it’s really useful for knitting infinity scarves with straight needles because, at the end of the pattern, you can just graft the stitches together!
Provisional cast-on
Step 1
Cast on your first stitch as you normally would. It doesn’t need to have a long tail or anything, so you don’t have to worry about that at all.

Step 2
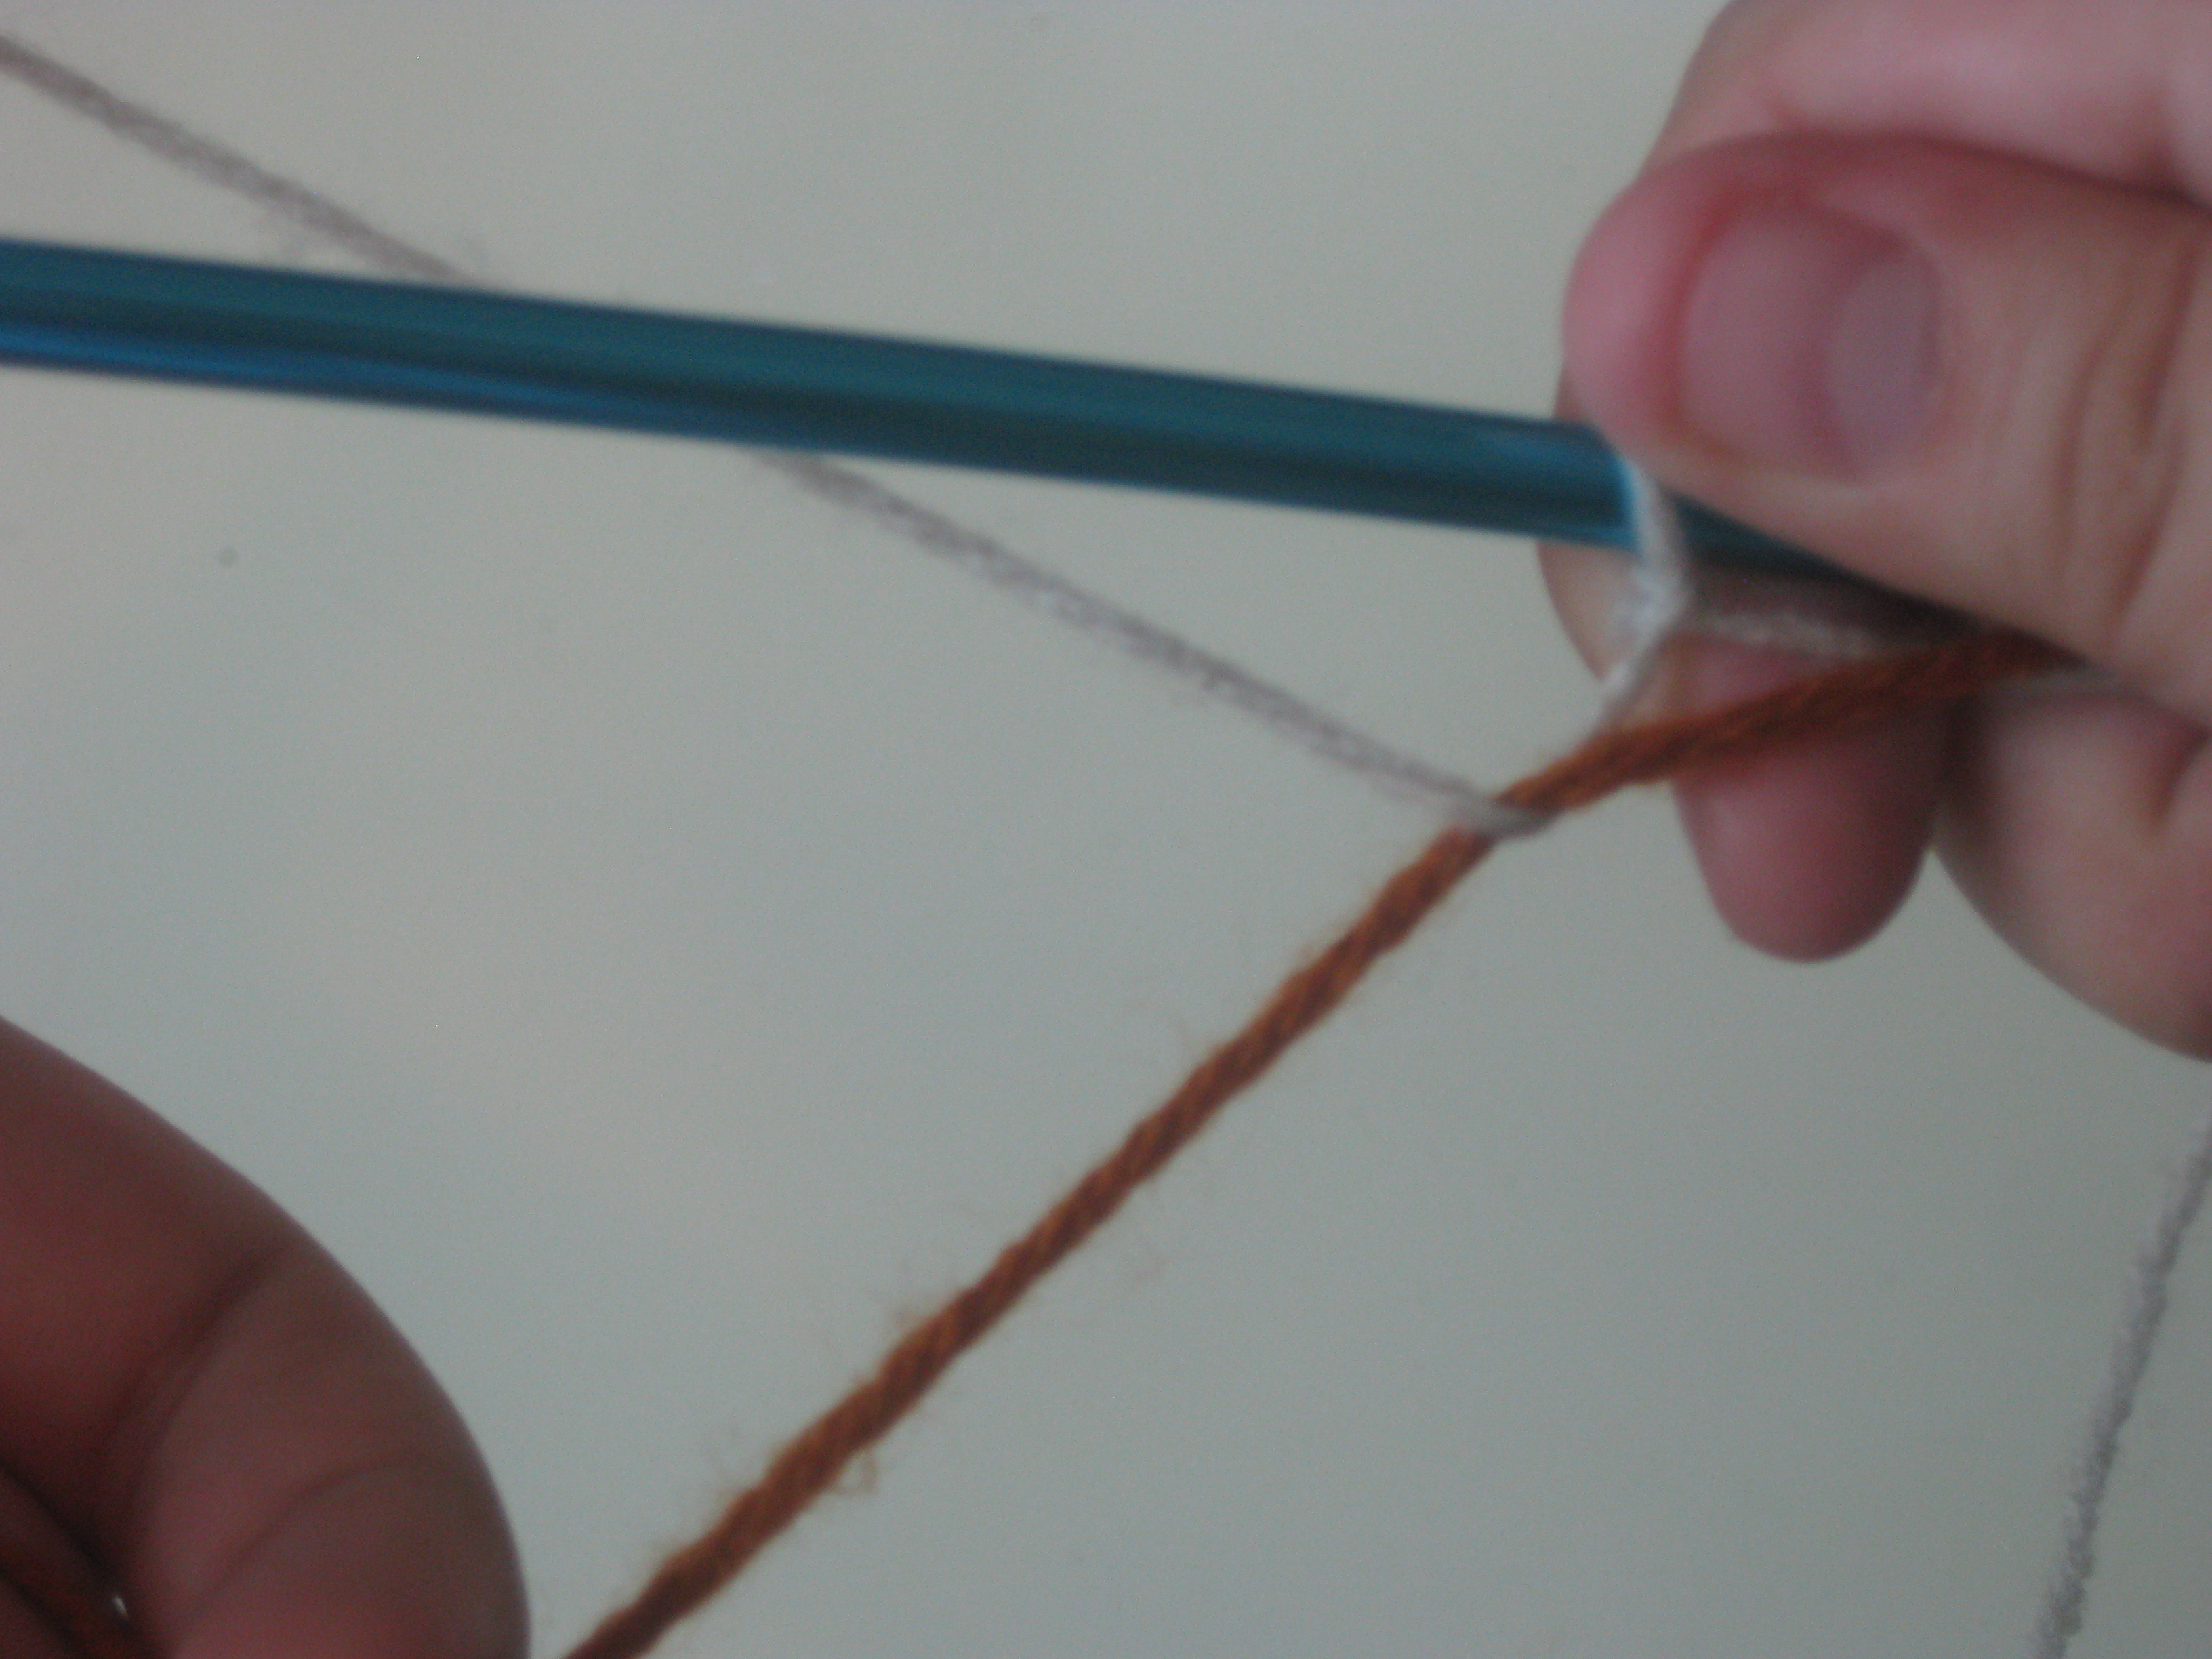
Take your scrap yarn and hold it parallel to the needle you’re casting the stitches on to, placing the working yarn behind your scrap yarn.

Step 3
Wrap the working yarn around the scrap yarn from back to front, and then pull the working yarn behind the needle.
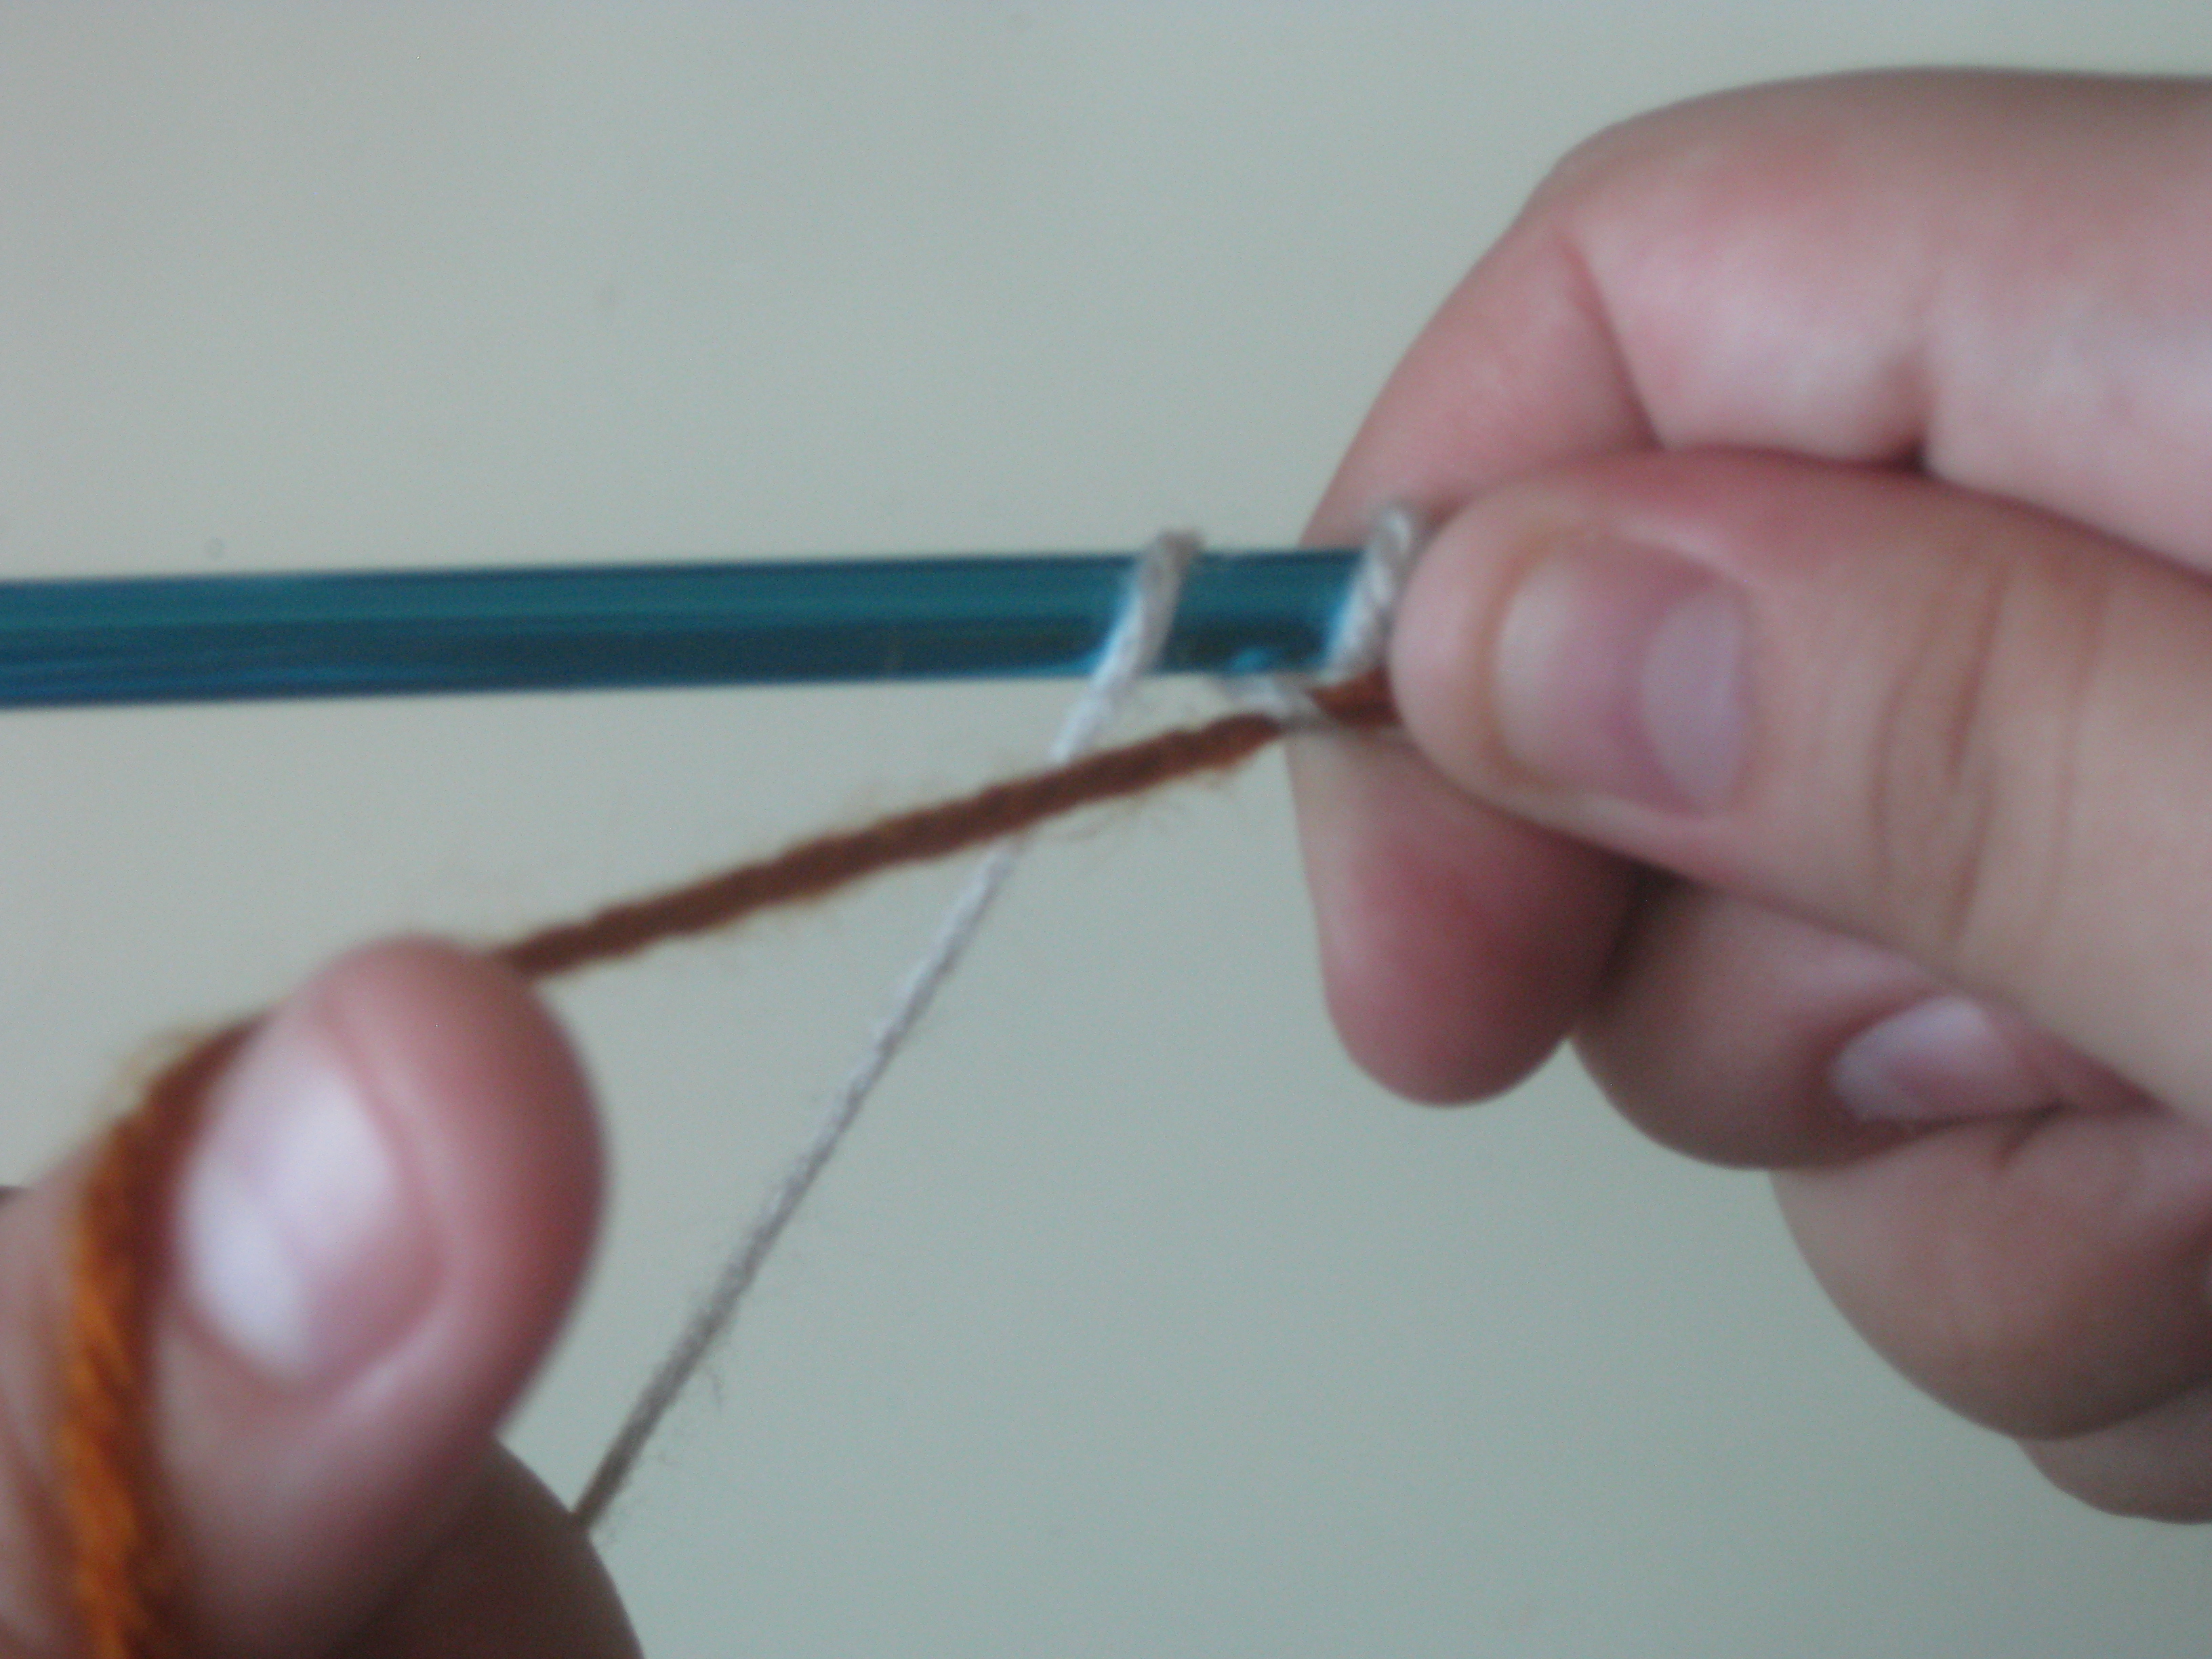
Step 4
Wrap the working yarn around the needle from back to front, and then pull the working yarn behind the scrap yarn.
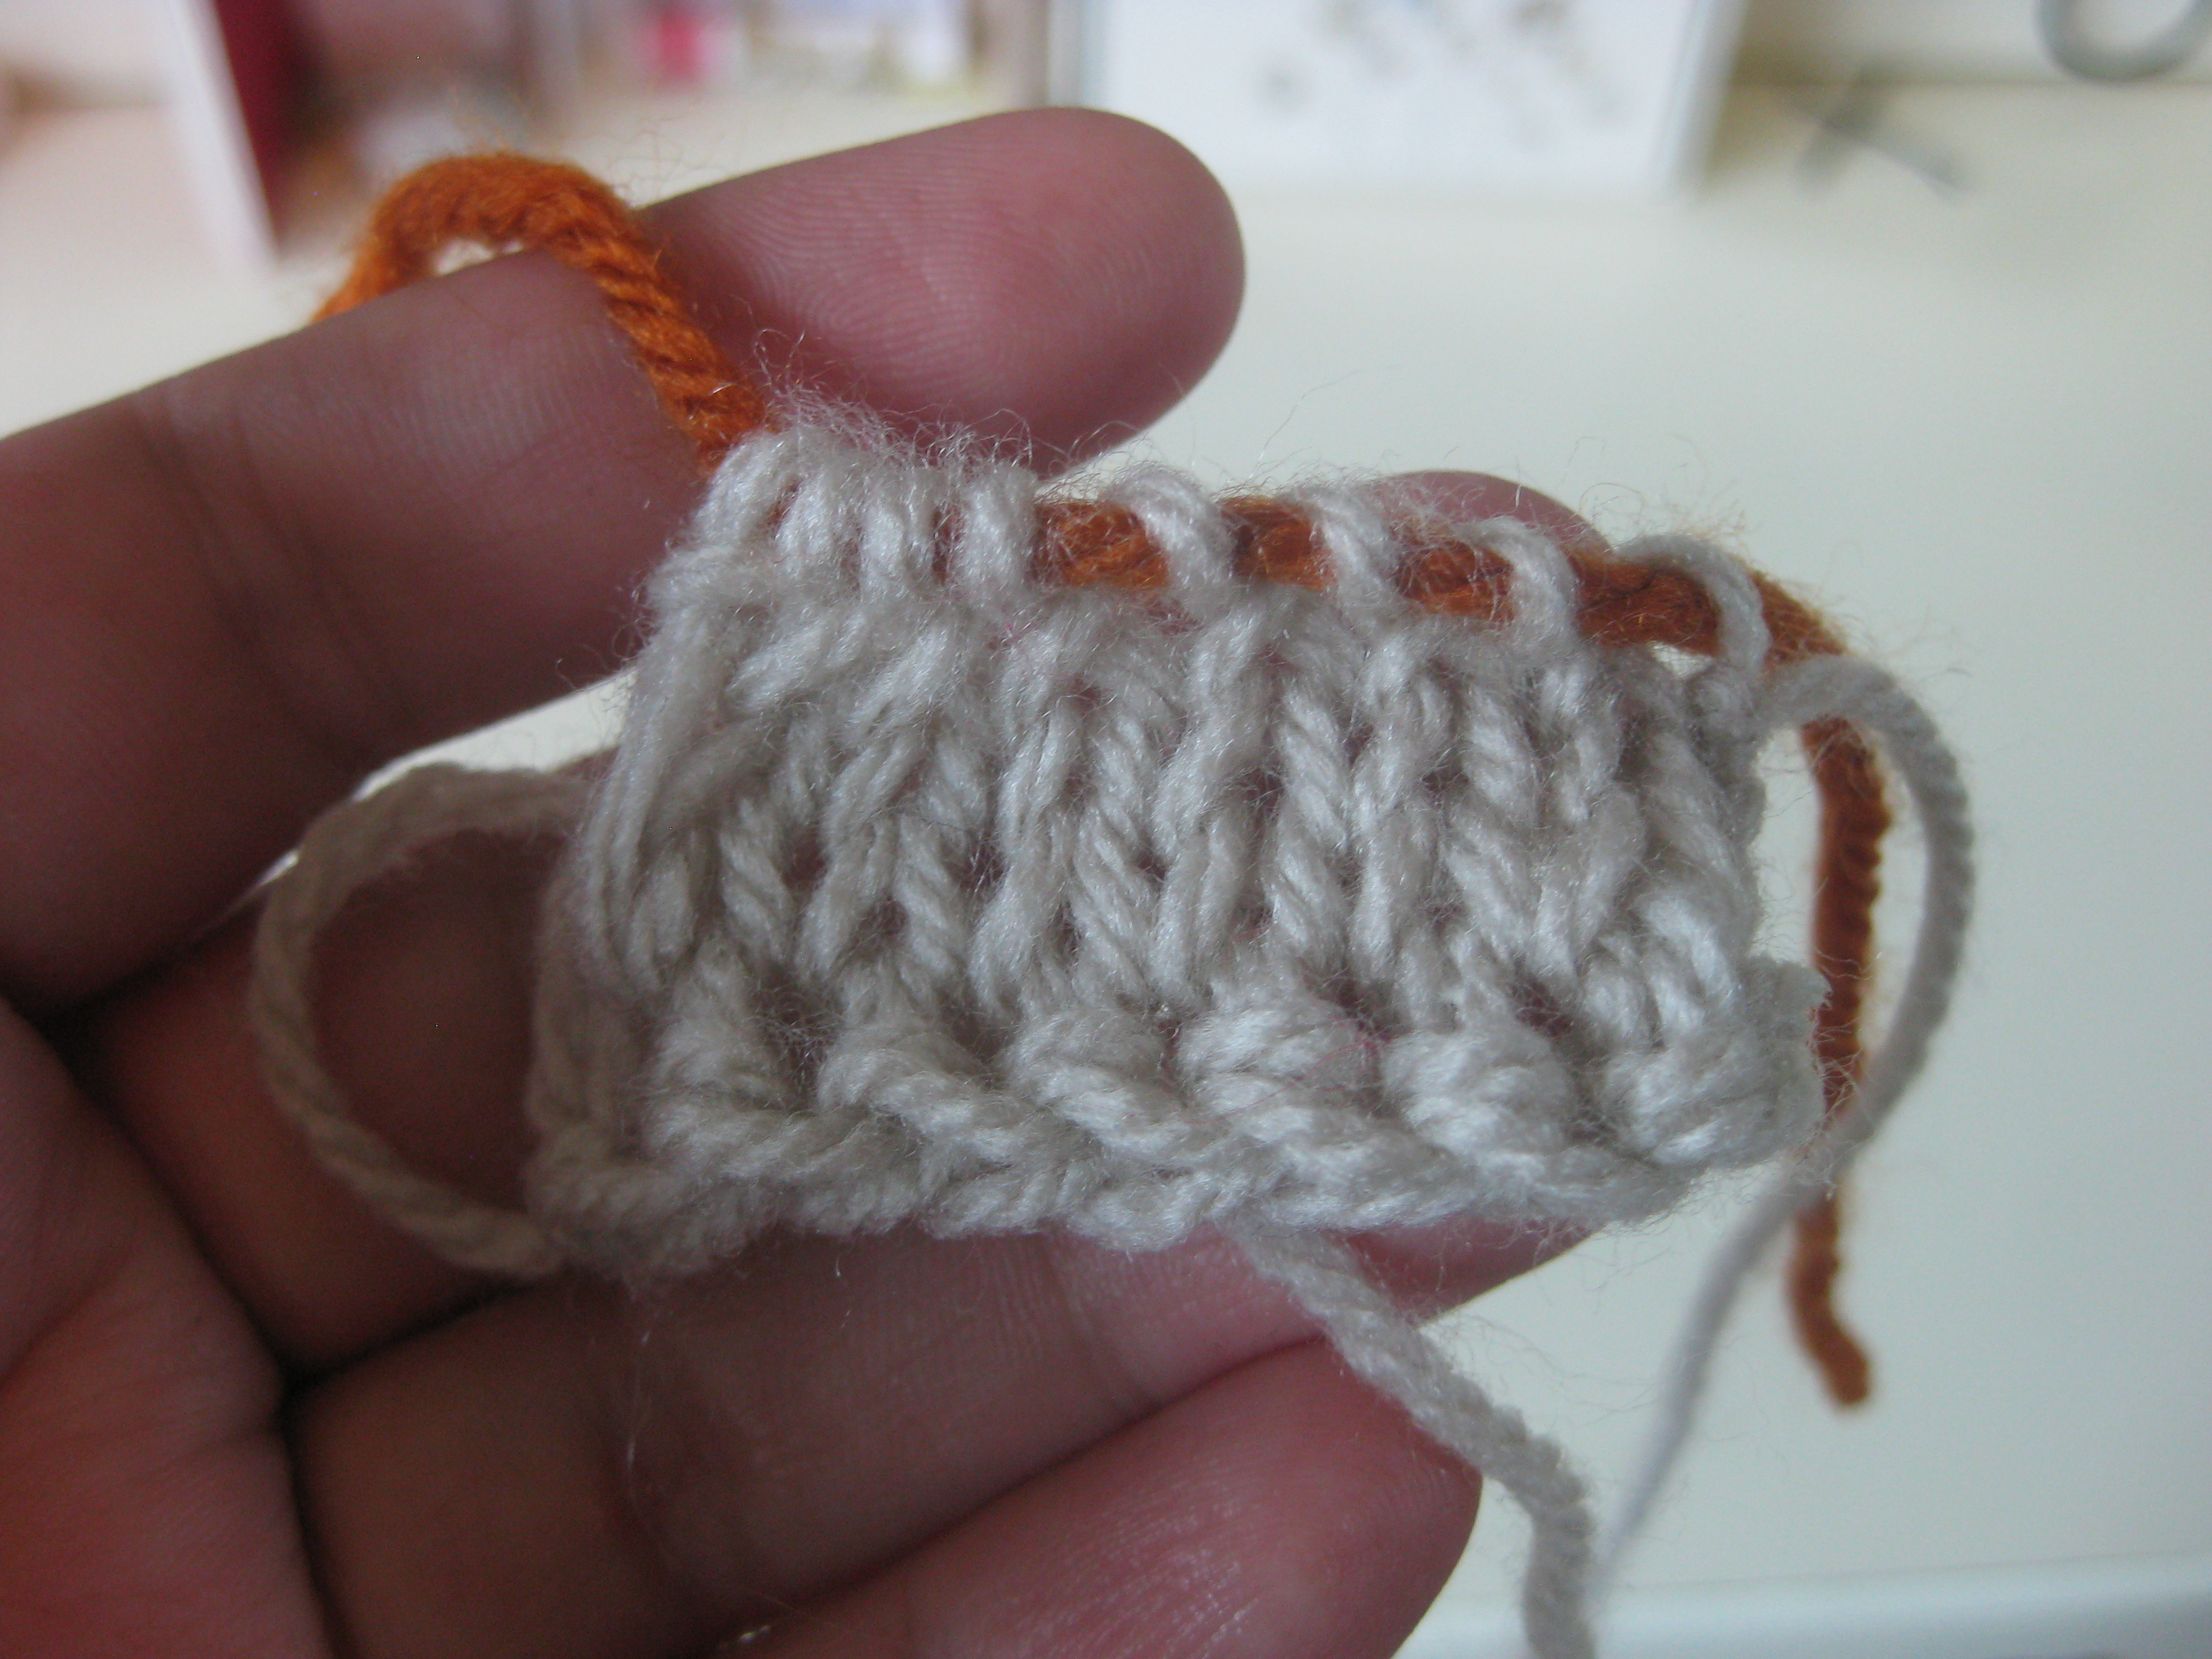
Step 5
Continue steps 3 & 4 until you’ve casted on the number of stitches you need. Take inventory, at this point, of the number of loops that are around the scrap yarn, as these are the stitches you’ll be using to pick up later on, so they should match the number of stitches that you casted-on to the needle.

Step 6
Keep on knitting, my friend.

Picking up (and knitting) the provisional stitches
Step 1
Once you’re done casting off, turn the piece over…
Step 2
…and slip the provisional stitches onto your needle. Remove the scrap yarn after the stitches are secured.

Step 3
Join the yarn you’ll be using, and just GO FOR IT!

It’s as easy as that!
Anyway, I hope that you’ll find this tutorial helpful, and, as always, please feel free to ask questions or leave comments!
Happy Knitting!
-pb
